Creating an Azure function that triggers when a blob is uploaded - Creating and running in Visual Studio 2017
Parts to this series:
- Creating an Azure function that triggers when a blob is uploaded
- Creating an Azure function that triggers when a blob is uploaded - Creating and running in Visual Studio 2017 (this one)
- Creating an Azure function that triggers when a blob is uploaded - Sending an email via Office 365
- Creating an Azure function that triggers when a blob is uploaded - Publishing to Azure from Visual Studio 2017
So, I want to send an email when a blob gets uploaded (actually, I don't, but it's a starting point!) which means I could do something like use SmtpClient as others have, but I thought it'd be a bit more interesting to use Exchange Web Services instead. As an added bonus, Microsoft provide a wrapper around the web services called Microsoft Exchange Web Services Managed API 2.2, also available at nuget.org as Microsoft.Exchange.WebServices. We could do this all "long hand" by crafting a project.json file and using nuget packages, or we could use Visual Studio to do all the heavy lifting for us. I've chosen to do the latter!
In this part I'll cover off creating the function and running it in Visual Studio, I'll actually plug-in the Email sending via Office 365 in a subsequent entry as that's the "easy" bit!
Creating an Azure Functions project in Visual Studio 2017
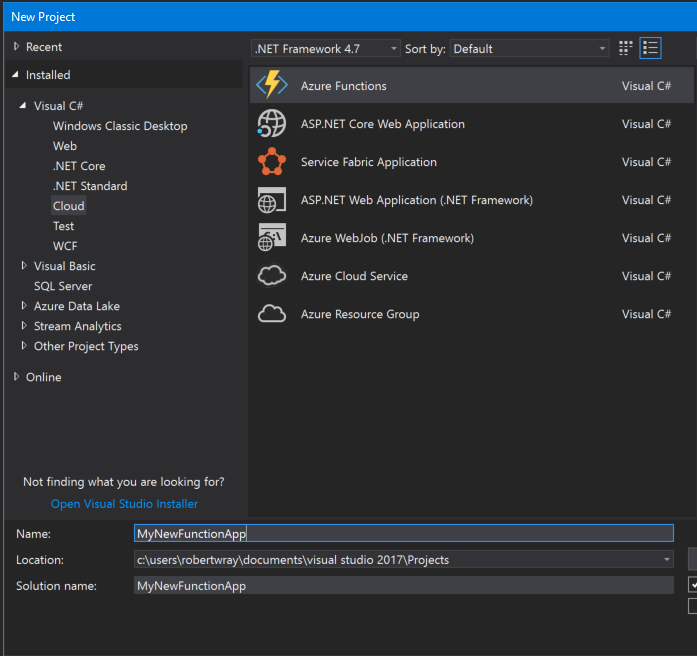
Creating a project is pretty easy, assuming you've got the appropriate "Workloads" installed. Start by opening a new instance of Visual Studio and going to File > New > Project. Work down through the "Installed" option on the left-hand side through "Visual C#" to "Cloud" and choose "Azure Functions". From here it's just a matter of giving your project a name and a location and clicking "OK"
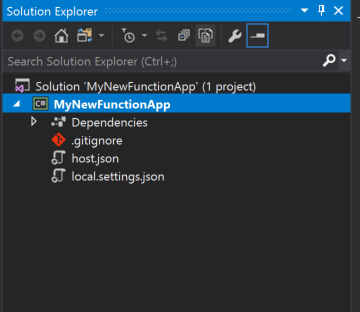
Once that's done, and you've sat watching the "Create new project" progress bar for a few seconds, you'll be left with a seemingly empty Visual Studio. Something has happened though, which you can see if you expand Solution Explorer:
Now it's just a matter of adding some settings to local.settings.json, adding the Microsoft.Exchange.WebServices package, putting together some code that talks to Exchange and hitting F5 to test the project locally.
Building out the project so it talks to Azure, then testing it
The first thing to do is add the package, so do that in whichever way you prefer, either via the Package Manager Console or via the Tools > NuGet Package Manager > Manage NuGet Packages for Solution... menu option. Next, let's add a function to the project, as the project is a container for many functions. So, right-click on the project node in Solution Explorer and choose Add > New Item.... Select Azure Function in the "Add New Item" window, give it a sensible filename (or not!) and click the Add button to start the process of creating your new Azure Function by bringing up the "New Azure Function" window where you can chose a function type and populate some settings.
For this, I'm going to choose "Blob trigger" as the type of function, specify the connection to be called "StorageConnection" and leave the "Path" at its default value of "samples-workitems".
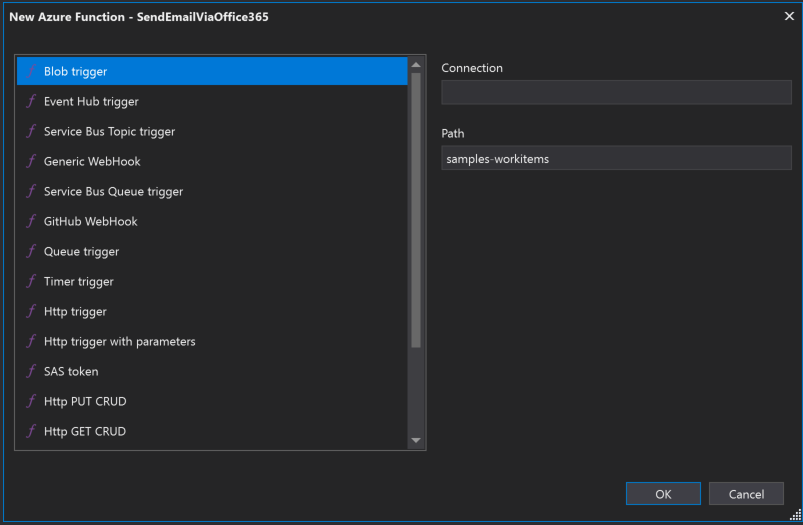
Once you've filled these in, click on OK and Visual Studio will create you a boilerplate filled function that should look a little (or, ideally, a lot!) like this:
using System.IO;
using Microsoft.Azure.WebJobs;
using Microsoft.Azure.WebJobs.Host;

namespace MyNewFunctionApp
{
    public static class SendEmailViaOffice365
    {
        [FunctionName("SendEmailViaOffice365")]
        public static void Run([BlobTrigger("samples-workitems/{name}", Connection = "StorageConnection")]Stream myBlob, string name, TraceWriter log)
        {
            log.Info($"C# Blob trigger function Processed blob\n Name:{name} \n Size: {myBlob.Length} Bytes");
        }
    }
}
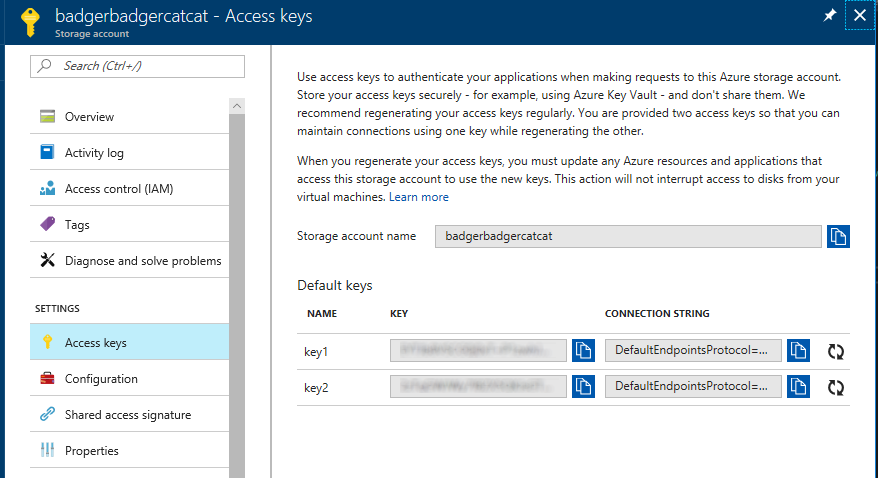
The next thing to do is to make sure that there's a valid storage connection string in "local.settings.json", so open that file up and add a key/value pair with a key name of "StorageConnection" and a value of the connection string for your storage account (you can obtain this in the Azure portal by navigating to your storage account and selecting "Access keys" under "Settings". The screengrab below shows you exactly where they are:
Whilst you're here, make sure you create a container in this storage account with the name that matches the one you specified when creating the function (so the one named in the BlobTrigger attribute on your functions Run method), if you accepted the defaults this will be "samples-workitems".
You should end up with a local.settings.json file that looks a little like this:
{
  "IsEncrypted": false,
  "Values": {
    "AzureWebJobsStorage": "",
    "AzureWebJobsDashboard": "",
    "StorageConnection": "DefaultEndpointsProtocol=https;AccountName=badgerbadgercatcat;AccountKey=<YOUR_ACCOUNT_KEY_HERE>;EndpointSuffix=core.windows.net"
  }
}
For your function to work, it needs somewhere to write information to (specifically it has to keep book-keeping to tell it which blobs it has and hasn't processed) so write the same value into the "AzureWebJobsStorage" entry, which means that your file will look like this:
{
  "IsEncrypted": false,
  "Values": {
    "AzureWebJobsStorage": "DefaultEndpointsProtocol=https;AccountName=badgerbadgercatcat;AccountKey=<YOUR_ACCOUNT_KEY_HERE>;EndpointSuffix=core.windows.net",
    "AzureWebJobsDashboard": "",
    "StorageConnection": "DefaultEndpointsProtocol=https;AccountName=badgerbadgercatcat;AccountKey=<YOUR_ACCOUNT_KEY_HERE>;EndpointSuffix=core.windows.net"
  }
}
Let's stop adding things to the project and see it actually working. Set a breakpoint on line 12 of your function, which should be the call to log.Info and press F5. If everything is setup and working, you should see a window that looks like this appear:
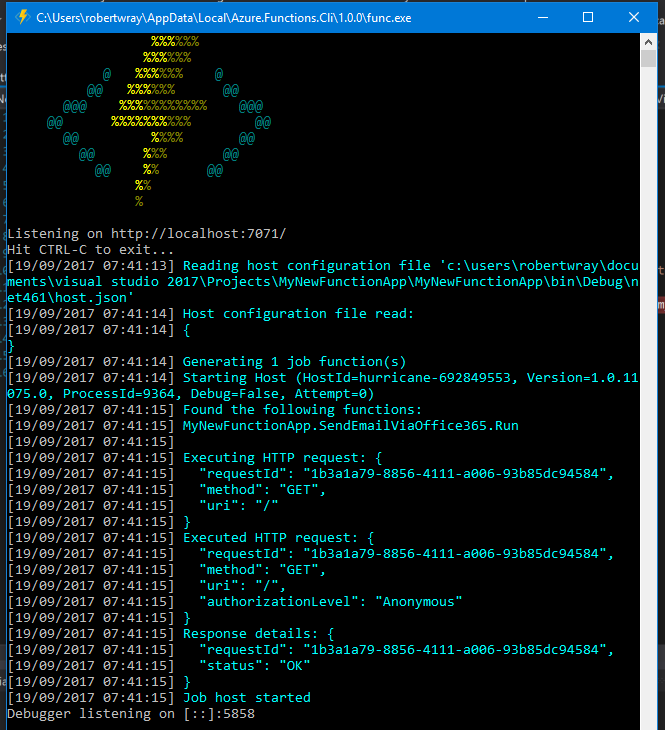
If there were any files in the samples-workitems container, you'll see your breakpoint hit immediately. If not, now's the time to use your method of choice (via the Azure Portal, or the Storage Explorer app) to upload a file to the container. When you do, your breakpoint should be hit, at which point you can inspect any of the values that are being passed into the function, just so you can see what they are and what gets passed in. I've uploaded the image of the local Azure Function host window for this purpose:

When you've finished having a look around at the code in Visual Studios debugger, press F5 to let it run through, and you should then see some more output in the console window:
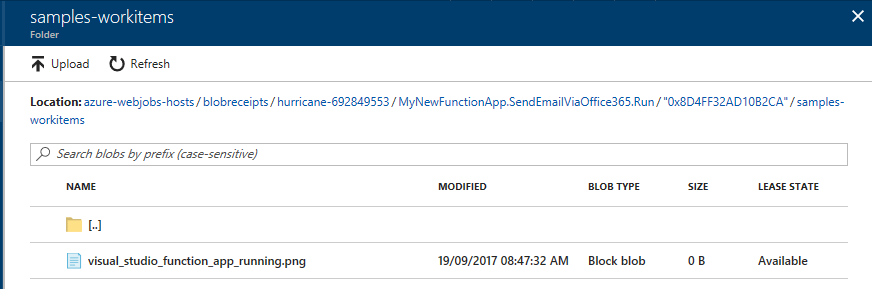
[19/09/2017 07:47:32] Function started (Id=534fa93f-c999-42a1-9190-00ea6510841f)
[19/09/2017 07:47:32] Executing 'SendEmailViaOffice365' (Reason='New blob detected: samples-workitems/visual_studio_function_app_running.png', Id=534fa93f-c999-42a1-9190-00ea6510841f)
[19/09/2017 07:50:07] C# Blob trigger function Processed blob
 Name:visual_studio_function_app_running.png
 Size: 56290 Bytes
[19/09/2017 07:50:07] Function completed (Success, Id=534fa93f-c999-42a1-9190-00ea6510841f, Duration=154259ms)
[19/09/2017 07:50:07] Executed 'SendEmailViaOffice365' (Succeeded, Id=534fa93f-c999-42a1-9190-00ea6510841f)
This means that your Azure function has successfully run, been triggered, has processed the blob that you uploaded and has written the output that your function generated (from the boilerplate provided) out to the log.
If you want, you can look in your storage account and see the book-keeping data that the runtime uses to keep track of which blobs have been processed by the function, and which ones haven't. The book-keeping records are stored per function/host, so if you create a new function, it looks like all blobs that are already in the container (which match the pattern in the BlobTrigger attribute, i.e. samples-workitems/{name}) will be passed to your function.