SQL Operations Studio is now Azure Data Studio, with added Azure Resource Explorer
In true Microsoft fashion, SQL Operations Studio has undergone a re-brand and is now Azure Data Studio (you can download it here). Along with the reccent re-brand of Visual Studio Team Services (the artist formerly known as Visual Studio Online) as Azure DevOps the move is strangely reminiscent of the era where everything and anything got .NET slapped on the end of its name, anyone remember Windows Server .NET?
Installing Azure Data Studio
Installing Azure Data Studio is pretty much the same as pre-rebrand, though during installation I spotted one irritation. Why, oh why, installer crafters do you insist on (a) having an option to add an icon to the desktop and worse, (b) ticking it by default?
![]()
There's also a tiny fit-and-finish glitch in the same page of the installer, where the option to register against supported file types looks like it's had the wrong token substituted, or not substituted at all (GitHub issue).
Installation is on a per-machine basis, rather than the per-user option now offered by Visual Studio Code, though there is an open GitHub issue for this with the 'October Release' milestone so it looks like this is on its way.
First Run
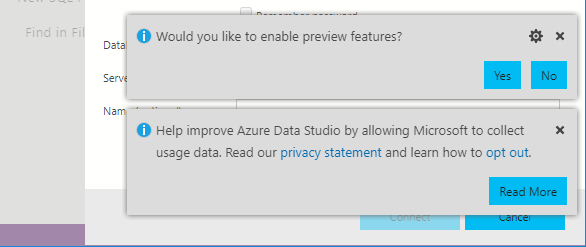
The first run of Azure Data Studio (which I'm going to call 'ADS' from now on!) starts with a couple of toast notifications, one offering to enable preview features and another around the collection of usage data. In a post-GDPR world, I've very much got a 'it must be opt-out' mentality and the toast notifies you that you're automatically opted in and provides a link to instructions regarding how to opt-out. Come on Microsoft, at the very least provide an option to opt-out directly from the toast but really you should be providing an opt-in here. If you can't do it from the toast, perhaps from the installer?
It'd also be great if a link was added to the 'Would you like to enable preview features?' toast to describe exactly what this does. Obviously it enables preview features, but how will I know what these are and is there a way to readily keep up-to-date with what's coming so I can dig-in, or opt-out as appropriate?
First up, apply the dark theme! Once that's done and your eyes have been soothed, everything looks pretty familar. Next up is having a quick look at one of the new features announced in the release notes, Azure Resource Explorer. A speedy look around the UI didn't show any obvious entry points for this, and a search of the internet only turned up other things called Azure Resource Explorer. Yay, more name overloading!
A careful re-read of the release notes and I spotted that Azure Resource Explorer was listed under "Announcing the SQL Server 2019 Preview extension", meaning that an extension needs to be installed before Azure Resource Explorer is accessible. If you install this, read the Extension Installation Notes carefully as this extension isn't click-to-install as it's implemented as a VSIX extension. These notes are more detailed regarding what you should expect to see than those on the download page so do read them.
Installing the SQL Server 2019 Preview extension
Open the Extensions side-bar by clicking on its icon, or pressing CTRL-SHIFT-X and search for '2019' to find the extension. Select it and click on the Install button near the top of the page that's opened. Once you've downloaded the installer VSIX file from your browser go back to ADS, choose Install Extension from VSIX Package from the File menu and then select the VSIX package from your download location. As the installation notes state, you'll see a warning regarding third party extensions displayed in a toast at the bottom-right of your screen that'll look like this:
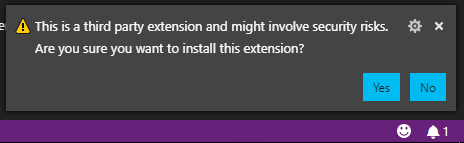
Assuming you choose Yes to let the package install you should see a "racing line" progress bar above the search box in the Extensions pane, accompanied by a clock icon overlaying the extensions icon in the Activity Bar until installation is complete. When complete a Reload button will appear next to the Install button, click it to continue.

Once ADS has reloaded, open the Output window by typing CTRL-SHIFT-U (or View menu > Output) and keep watching for the string mentioned in the installation notes before trying to use anything, i.e. this one:
... Creating c:\Users\robertwray.cocktail\.azuredatastudio\extensions\microsoft.sql-vnext-0.6.9\jupyter_config\kernels_master
Now you can click on the Azure icon that's been added to the Activity Bar and get started!
Finally, Azure Resource Explorer!
Clicking on the Azure icon pops-out a very nondescript panel that contains the single item Sign in to Azure ... clicking on that pops a pane on the right-hand side to add an account. I'm going to go through this in a bit of detail as it's not a case of enter your username and password and away you go. Clicking on the Add an Account button brings up this:
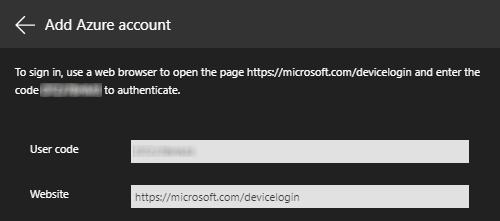
Look out for the Copy & Open button at the bottom of the pane, this will open the page for you and copy the code to your clipboard ready for when your browser lands you on this page:
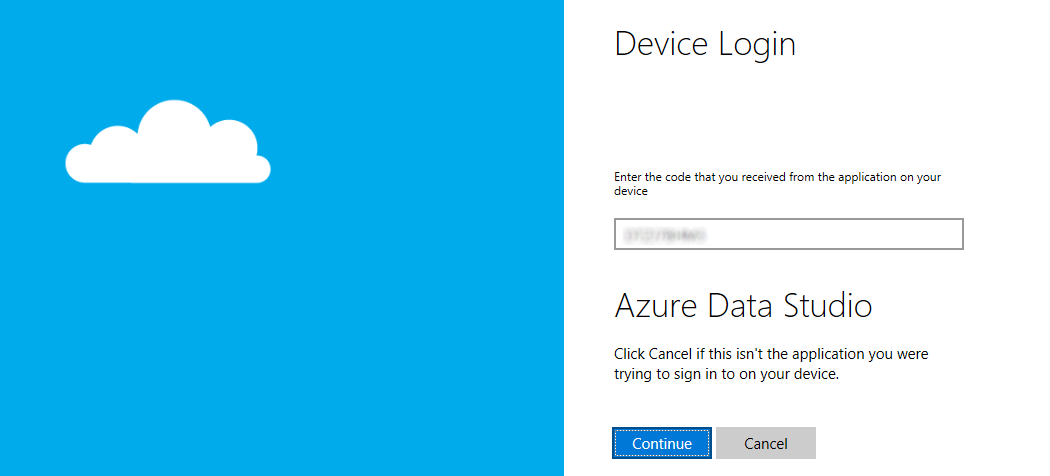
Paste your code in, or if youre a glutton for punishment type it in from memory, and click Continue to approve the request from ADS for access to your account. You can now go back to ADS and wait for it to pick-up that the request has been approved. With a bit of luck this won't take more than a few seconds and then you'll see:
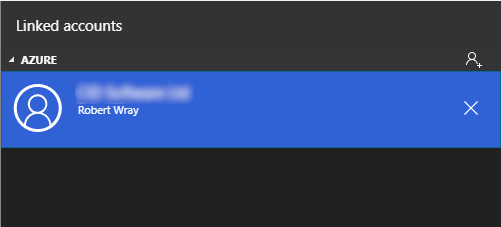
Now that ADS is allowed access to your Azure account you can press the Close button at the bottom of the Linked accounts window and go back to the Azure: Resource Explorer pane!
TIP: If you want to add another account / get back to the Linked accounts pane there should be a little "two person" icon at the bottom-left of the status bar of your ADS window
Finally, finally: Azure Resource Explorer!
It's fair to say it's been a long road to get here, but you should be able to see yourself listed in a tree-view in the resource explorer pane now. Expanding this will show you the subscriptions that you have available which can be further expanded to show you the SQL Databases and SQL Servers you've either created or been given access to:
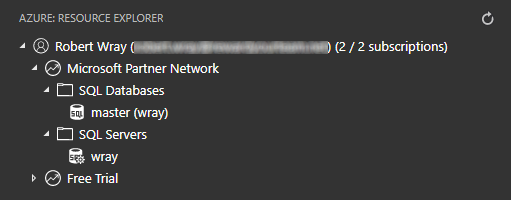
From here you can select a database, or server, and either right-click and choose Connect from the very sparse context menu or click the 'plug' icon that'll have appeared to the right of the SQL Server or SQL Database.
That's about all that ARE shows at you, at the moment! So a little bit anticlimatic, but as well as enumerating the SQL resources you have it does also pre-fill the fully-qualfiied server name for you when connecting to one. Hopefully there'll be more added over the coming weeks and months to make it a richer and more useful extension to Azure Data Studio!
Random aside: If you've forgotten the password for the myadmin account (like I had!), go to Azure and change it here:
