Generating an SSL certificate with SANs via a Windows Certificate Authority
There are doubtless other ways to generate an SSL certificate through a Windows Certificate Authority which have associated SANs (Subject Alternative Names), but one way I've found is particularly easy is to use OpenSSL to generate the CSR (Certificate Signing Request) file. Newer versions of Chrome, and other browsers, have removed support for commonName matching in Certificates:
RFC 2818 describes two methods to match a domain name against a certificate - using the available names within the subjectAlternativeName extension, or, in the absence of a SAN extension, falling back to the commonName. The fallback to the commonName was deprecated in RFC 2818 (published in 2000), but support still remains in a number of TLS clients, often incorrectly.
This causes a problem with certificate requests that are generated via Internet Information Services (IIS) Manager tool in Windows as this doesn't add SANs to the CSR that's generated, so using OpenSSL to generate the CSR to submit to the Windows Certificate Authority is a viable solution.
Generating the CSR
Firstly, make sure that you've got OpenSSL downloaded/installed, I've used the 64-bit installer from https://slproweb.com/products/Win32OpenSSL.html but if you're not on a Windows system the steps should be pretty much the same.
The next thing to do is to generate the configuration to pass to OpenSSH, basically the details of the certificate that you want to have generated. Here's a specimen configuration, which I put in a file named star_dot_robertwray_dot_local.conf:
[req]
distinguished_name = req_distinguished_name
req_extensions = v3_req
prompt = no
[req_distinguished_name]
C = GB
ST = London
L = London
O = Robert Wray
OU = Robert Wray
CN = robertwray.local
[v3_req]
keyUsage = keyEncipherment, dataEncipherment
extendedKeyUsage = serverAuth
subjectAltName = @alt_names
[alt_names]
DNS.1 = *.robertwray.local
DNS.2 = robertwray.local
DNS.3 = dev1.staging.robertwray.local
There's not a lot that's very interesting here, the key bits that require editing are in bold text and are:
- C/ST/L/O/OU - These are the fields that you'd ordinarily fill out by completing the 'Create Certificate Request...' wizard in IIS Manager that describe the organisation (in this case me!) that the certificate will be issued to
- CN - This is the Common Name for the certificate, it's this that is no longer being used for domain name matching. I think I read somewhere whilst researching this that it should match one of the names that certificate is being issed for, i.e. You should always have a Common Name for your certificate that also exists as a SAN, rather than being something arbitrary
- DNS.x - This is the list of SANs for your certificate
Once that file's been saved the next thing to do is to pass it through OpenSSL to generate the CSR and the Private Key that's associated with it. This is a single line command through the OpenSSL binary that will look a little like this:
openssl req -new -out star_dot_robertwray_dot_local.csr -newkey rsa:2048 -nodes -sha256 -keyout star_dot_robertwray_dot_local.key -config star_dot_robertwray_dot_local.conf
The three interesting parameters here, which are again in bold, are -out, -keyout and -config. The file specified by -out will contain the generated CSR, by -keyout will contain the private key and the file specified by -config is the details of the certificate that you want to generate. The output from running this should look a little like this:
Generating a 2048 bit RSA private key
.....+++
...........................................................................................................................................+++
writing new private key to 'star_dot_robertwray_dot_local.key'
-----
And there should be the two new files created, the .csr and the .key file. Looking inside them will show files that start with "-----BEGIN CERTIFICATE REQUEST-----" and "-----BEGIN PRIVATE KEY-----" respectively.
Requesting the Certificate
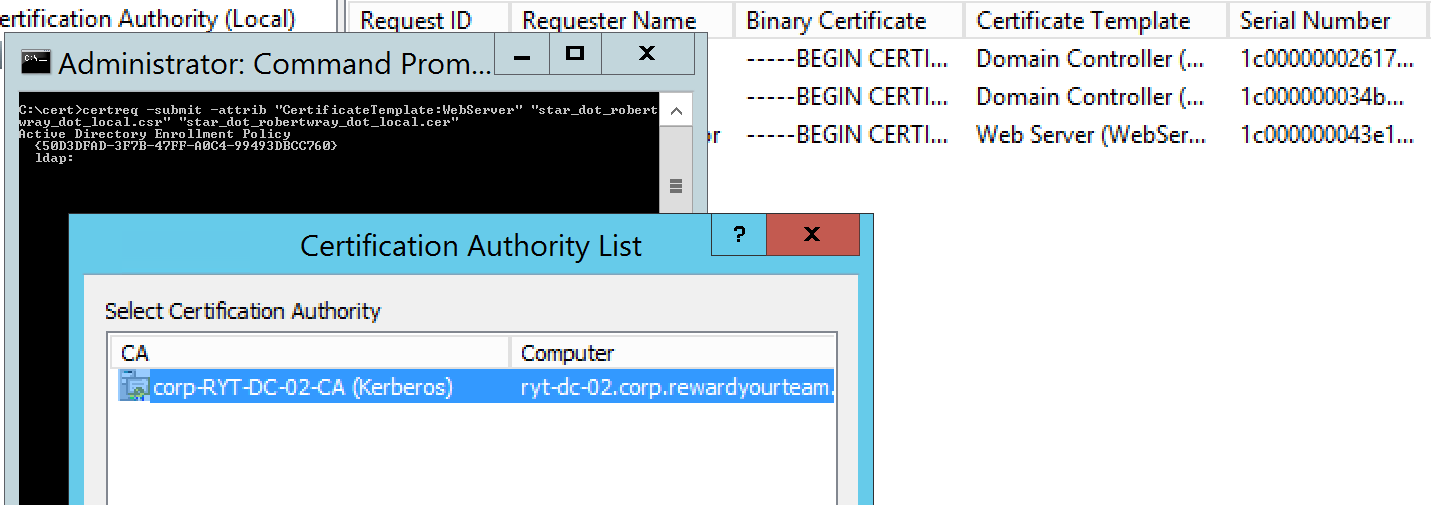
Next up is taking the generated CSR and passsing it to the Windows Certificate Authority. The method I've used is to use the command line certreq tool to do so. The syntax for calling this command is (from an Administrative command prompt):
certreq -submit -attrib "CertificateTemplate:WebServer" "star_dot_robertwray_dot_local.csr" "star_dot_robertwray_dot_local.cer"
The key parts of this command are:
- -attrib "CertificateTemplate:WebServer" - this tells your CA that the certificate you're requesting is for use by a web server
- "star_dot_robertwray_dot_local.csr" - this is the path to the CSR that you generated earlier. If you're not running certreq from the folder this file is in, make sure you provide an absolute path to the file
- "star_dot_robertwray_dot_local.cer" - this is the file that the certificate issued by the CA server
Once you've run this command you should have ended up with a folder (assuming you've run all these commands from the same location!) containing a .conf, .csr, .key and .cer. For the very last step, all we need are the .key and the .cer.
If, for any reason, the request to generate the certificate is rejected (e.g. the user you're making the requests from doesn't have rights to the CA), you or an administrator can use the Certification Authority to issue the certificate against the failed request and then export it (by viewing the certificate, using 'Copy to File...' on the 'Details' tab and exporting it to Base-64 encoded X.509).
Combining the Certificate & Private Key
In order to install the generated certificate on your web server, it needs to be combined with the private key and installed on the web server, one way to do this is to generate a PFX file that contains both the certificate and the private key. Once again, this is something that can be achieved by using OpenSSL, with this command:
openssl pkcs12 -export -out star_dot_robertwray_dot_local.pfx -inkey star_dot_robertwray_dot_local.key -in star_dot_robertwray_dot_local.cer
As with the first OpenSSL command, where the CSR and Private Key were generated, there are three interesting parameters, -out, -inkey and -in. The file specified by -out will contain the generated PFX file, -inkey is the private key being passed in and -in is the certificate being passed in. OpenSSL will prompt you for a password to protect the generated PFX file with, i.e. the password you'll be prompted for when you import the PFX into IIS / the certificate store