Creating an Azure function that triggers when a blob is uploaded - Sending an email via Office 365
Parts to this series:
- Creating an Azure function that triggers when a blob is uploaded
- Creating an Azure function that triggers when a blob is uploaded - Creating and running in Visual Studio 2017
- Creating an Azure function that triggers when a blob is uploaded - Sending an email via Office 365 (this one)
- Creating an Azure function that triggers when a blob is uploaded - Publishing to Azure from Visual Studio 2017
The next step is to actually send an email through Office 365 when a blob is uploaded. This is actually the "easy" bit as it's a couple of chunks of code that talk to Exchange Web Services to send the email. The actual content of the email is entirely up to you.
Sending an email through Office 365 in a Console App
First I'm going to take a quick step back and put together the code for sending an email through Office 365 in a simple console application, before I plug it into the Azure function. So, starting with a new console application in Visual Studio 2017 (File > New Project > Visual C# > Windows Classic Desktop > Console App (.net Framework)", which I've imaginatively named ConsoleAppToSendEmailThroughOffice365, add the Microsoft.Exchange.WebServices NuGet package:
PM> Install-Package Microsoft.Exchange.WebServices
Because I'm going to keep all the settings in a json configuration file (the username and password for connecting to Office 365), I also need to install the package Microsoft.Extensions.Configuration.Json which will also pull in other dependencies for the configuration infrastructure within .NET Core (even though I'm using it in a .NET Framework project) as this means that I can use a JSON configuration file for the username/password for Office 365 very easily. Once that's done, add a new JSON file called "config.json" to the project and set its build action to be Copy Always

Now to put some configuration into the file, the username and password for connecting to Office 365 will be whatever yours are, but the file will end up looking something like this:
{
  "office365Settings": {
    "username": "[email protected]",
    "password": "<PASSWORD_GOES_HERE>"
  }
}
Next we need some code, which is 90% plumbing, to retrieve the username and pasword value so we can get on with the real-work of talking to Office 365 and sending the email. This is a method called GetConfiguration that retrieves an instance of something that implements IConfigurationRoot so that we can get at our config:
private static IConfigurationRoot GetConfiguration()
{
    var configurationBuilder = new ConfigurationBuilder();
    configurationBuilder.AddJsonFile("config.json", false);

    var configurationRoot = configurationBuilder.Build();

    return configurationRoot;
}
There's lots of funky stuff that you can do with this, but just pulling the values from the config.json file is sufficient for this and stops me having to remember to remove the password from every snippet of code I paste! (Having working code that I can run & debug as I'm writing this up is a lot better than having something I have to keep editing/un-editing to add/remove the password) So now we've got something to store the username/password and could really do with some code that uses it, so the first thing to do is build a WebCredentials object:
static void Main(string[] args)
{
    var configurationRoot = GetConfiguration();
    var office365Settings = configurationRoot.GetSection("office365Settings");

    var username = office365Settings["username"];
    var password = office365Settings["password"];

    var credentials = new WebCredentials(username, password);
}
Next up is to create a new method, called "SendEmail" that takes credentials as a parameter, along with the "from" address, with everything else hard-coded inside the method, like the email address to send to, the subject and the content of the email, and try and send an email. This actually requires a surprisingly small amount of code! First up is creating an instance of the ExchangeService class (Microsoft.Exchange.WebServices.Data.ExchangeService), followed up by setting its Credentials property to be the passed in WebCredentials object.
var service = new ExchangeService
{
    Credentials = credentials
};
Next we need to tell the ExchangeService instance to use the Office 365 / Exchange "Autodiscover" service to work out where it should be talking to (i.e. what server hosts the mailbox/account/user that we're sending this email from). This involves calling the AutodiscoverUrl method and also having a callback function that the EWS wrapper can invoke to determine whether to permit any redirection URL that is returned. In this example I'm going to use a very simple callback that just checks to confirm that the URL is being served over HTTPS. If you set a breakpoint inside the callback, you'll see the redirectionUrl may well look something like this https://autodiscover-s.outlook.com/autodiscover/autodiscover.xml. So, now we have a SendEmail method, and a callback for the AutodiscoverUrl method that looks like this:
private static void SendEmail(WebCredentials credentials, string fromAddress)
{
    var service = new ExchangeService
    {
        Credentials = credentials
    };

    service.AutodiscoverUrl(fromAddress, RedirectionUrlValidationCallback);

    // TODO: Write the code that composes and sends the email
}

private static bool RedirectionUrlValidationCallback(string redirectionUrl)
{
    // The default for the validation callback is to reject the URL.
    bool result = false;

    Uri redirectionUri = new Uri(redirectionUrl);

    // Validate the contents of the redirection URL. In this simple validation
    // callback, the redirection URL is considered valid if it is using HTTPS
    // to encrypt the authentication credentials.
    if (redirectionUri.Scheme == "https")
    {
        result = true;
    }
    return result;
}
The very last thing to do is to put the email together and send it, there's a TODO in the code above that needs to be filled out. Without further exposition, here's the code to plug in there:
var message = new EmailMessage(service)
{
    From = fromAddress,
    Subject = "Subject Line",
    Body = new MessageBody(BodyType.HTML, $"<h1>This is a test, generated at ${DateTime.Now}</h1>")
};

message.ToRecipients.Add("<YOUR_EMAIL_ADDRESS>");

message.Send();
Et voila:

Sending an email through Office 365 in the Azure Function
This is the easy bit as it's pretty much a straight "lift and shift" of the code into the Azure function. I'm going to start by doing this, but with added subject, messageBody and recipient parameters on the SendEmail method so that we can pass in the subject line for the email, the message body and the email address of the recipient. This will allow us to customise the content of the email so that it reflects details of the blob that was uploaded, something that's useful so we can see from the email what the blob is, rather than just that a blob has arrived. Calling the method will now look like this:
SendEmail(credentials, username, "<RECIPIENT_EMAIL_ADDRESS>", "Subject Line", $"<h1>Content of email generated at {DateTime.Now}<h1>");
Once the code from the console app has been dropped into the function, and the call to SendEmail has been added to the Run method (for now manually creating an instance of WebCredentials and hard-coding the username/password), hit F5 to start the Azure funtion host, upload a file to the blob container and an email will arrive:
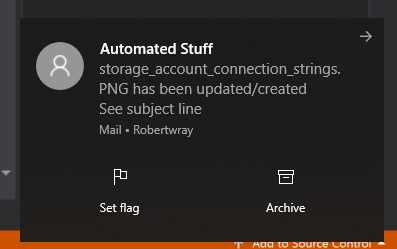
I've tweaked the subject line of the email slightly, so that it shows the name of the file that's been uploaded, so my Run method looks like this:
[FunctionName("SendEmailViaOffice365")]
public static void Run([BlobTrigger("samples-workitems/{name}", Connection = "StorageConnection")]Stream myBlob, string name, TraceWriter log)
{
    log.Info($"C# Blob trigger function Processed blob\n Name:{name} \n Size: {myBlob.Length} Bytes");

    var credentials = new WebCredentials("<USERNAME_FOR_OFFICE_365>", "<PASSWORD_FOR_OFFICE365>");

    SendEmail(credentials, "<USERNAME_FOR_OFFICE_365>", "<ADDRESS_OF_EMAIL_RECIPIENT>", $"{name} has been updated/created", "See subject line");
}
The next step is to tweak the function so that the Username and Password are retrieved from settings defined for the Azure function.
Storing and retrieving the Office 365 username and password outside the code
First, add an assembly reference to the System.Configuration assembly (as we're going to be using the "old" ConfigurationManager class here), then add a couple of entries to the local.settings.json file that contain the values, so we'll have something that looks like this:
{
  "IsEncrypted": false,
  "Values": {
    "AzureWebJobsStorage": "STORAGE_CONNECTION_STRING_HERE",
    "AzureWebJobsDashboard": "",
    "StorageConnection": "STORAGE_CONNECTION_STRING_HERE",
    "office365Username": "OFFICE_365_LOGIN_USERNAME",
    "office365Password": "OFFICE_365_LOGIN_PASSWORD"
  }
}
The code to create the WebCredentials instance that gets passed to the SendEmail method then becomes:
var username = ConfigurationManager.AppSettings["office365Username"];
var password = ConfigurationManager.AppSettings["office365Password"];

var credentials = new WebCredentials(username, password);
The same as before, press F5, upload a blob and watch the email land in your inbox. Simple!
All that's left to do now is to publish the function up into Azure "proper" and store the configuration settings, then that's an email generated for each blob uploaded to the target storage account.